Hi Etrewsian,
Today, I'm gonna share and teach you a step by step procedure on "How to create your own tag category on Tumblr". Let me just say that I just want to share what I did, I'm not a professional in terms of HTML and CSS codes or whatever they call it. I had a hard time finding a solution for that on my case and I google always to find it but still can't find it! Until one day I just figure out myself.
Ok! Let's Start....
This is how it looks like when done:

I have a single column theme on my tumblr so I put it before the Footer tag. But if you have two column theme on your tumblr just look for the sidebar on your HTML then put it after all the codes in there, some may put before the Latest Tweet tag of their sidebar.
Here we go
First Log in to Tumblr.
click the images for a much larger view
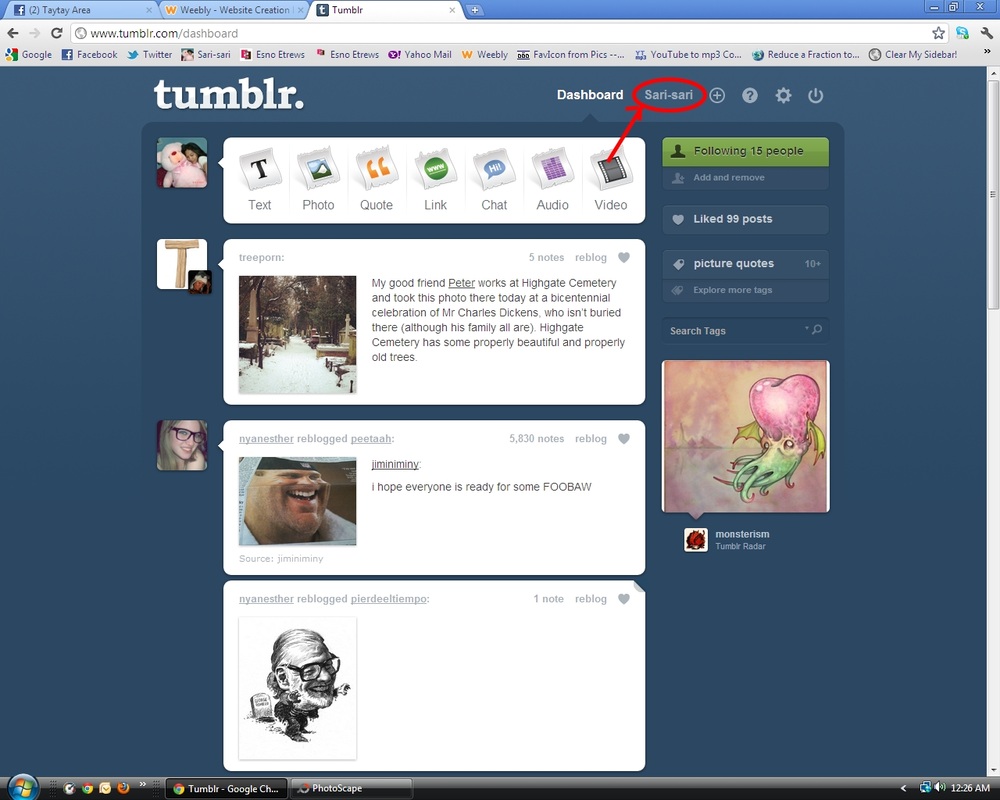
Click the Title of your Tumblr.

Click customize appearance.
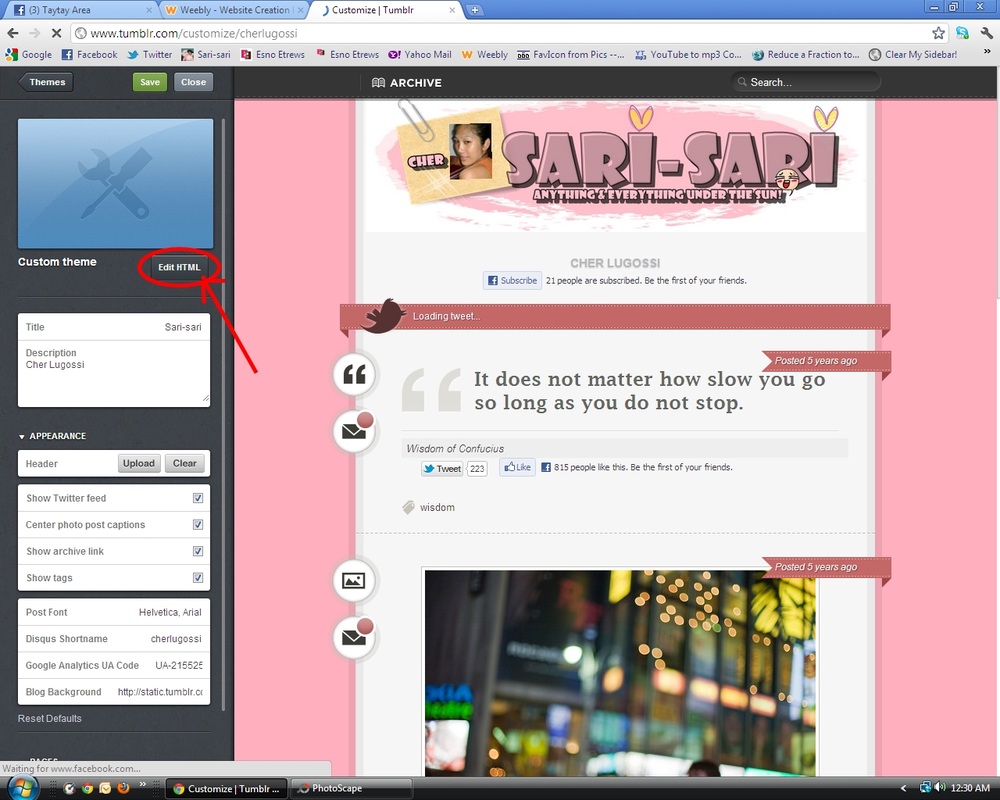
Click edit html.

Copy and Paste this code before the </style> tag
#text {
position: relative;
width: 50px;
height: 20px;
margin: auto;
font-size: 20px;
top: 15px;
right: 9px;
text-align: center;
}
.mytagged {
position: relative;
text-align: center;
margin; auto;
font-size: 14px;
bottom: 5px;
}
.mytagged a:hover {
color: #ffafbe;
}
#text {
position: relative;
width: 50px;
height: 20px;
margin: auto;
font-size: 20px;
top: 15px;
right: 9px;
text-align: center;
}
.mytagged {
position: relative;
text-align: center;
margin; auto;
font-size: 14px;
bottom: 5px;
}
.mytagged a:hover {
color: #ffafbe;
}
Feel free to edit the width, height and/or font-size
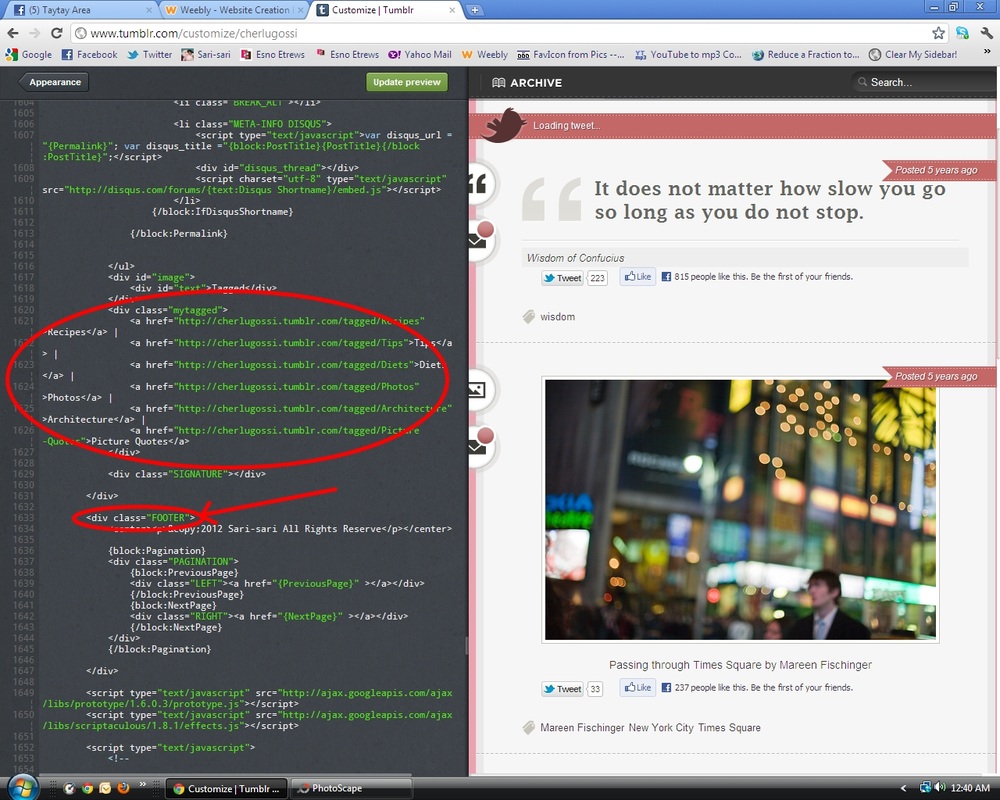
Scroll down the Html panel to look for the FOOTER, then Copy and Paste this code before it.
<div id="text">Tagged</div>
<div class="mytagged>
<a href="http://you.tumblr.com/tagged/Tag1">Tag1</a> |
<a href="http://you.tumblr.com/tagged/Tag2">Tag2</a> |
<a href="http://you.tumblr.com/tagged/Tag3">Tag3</a> |
</div>
</div>
<div id="text">Tagged</div>
<div class="mytagged>
<a href="http://you.tumblr.com/tagged/Tag1">Tag1</a> |
<a href="http://you.tumblr.com/tagged/Tag2">Tag2</a> |
<a href="http://you.tumblr.com/tagged/Tag3">Tag3</a> |
</div>
</div>
Just replace the "you" and "Tag" e.g. "http://cherlugossi.tumblr.com/tagged/Recipes">Recipes</a>
you is your tumblr address and Tag is the name of your tag.
Don't forget to Capitalize the first letter of your Tags or it will not work properly.
Click the Update Preview to see some changes then back to Appearance. Save and Close. We're Done!!
you is your tumblr address and Tag is the name of your tag.
Don't forget to Capitalize the first letter of your Tags or it will not work properly.
Click the Update Preview to see some changes then back to Appearance. Save and Close. We're Done!!

Cher Lugossi
Yay!!! That's me :) follow me on Twitter
